
Azure OMS Workspace: A Comprehensive Guide for Enhanced Monitoring and Management
Are you looking to enhance the monitoring and management capabilities of your IT infrastructure? Look no further than the Azure OMS Workspace. This powerful tool offers a wide range of features that can help you streamline your operations and ensure the smooth running of your systems. In this article, we will delve into the various aspects of the Azure OMS Workspace, providing you with a detailed and multi-dimensional introduction.
Understanding Azure OMS Workspace

The Azure OMS Workspace, also known as Azure Operations Management Suite Workspace, is a cloud-based platform that provides a centralized location for monitoring and managing your IT environment. It integrates with various Azure services and third-party solutions to offer a comprehensive view of your infrastructure, applications, and devices.
By leveraging the Azure OMS Workspace, you can gain insights into the performance and health of your systems, identify potential issues, and take proactive measures to prevent downtime. It is designed to be scalable and flexible, catering to the needs of organizations of all sizes.
Key Features of Azure OMS Workspace
Let’s explore some of the key features that make the Azure OMS Workspace a valuable tool for IT professionals:
| Feature | Description |
|---|---|
| Log Analytics | Collect, analyze, and visualize log data from various sources, including Windows and Linux servers, virtual machines, and cloud services. |
| Automation | Automate routine IT tasks and workflows using PowerShell scripts and Azure Automation. |
| Backup | Protect your data by backing up critical systems and applications to Azure Blob Storage. |
| Security | Enhance the security of your environment with advanced threat protection and security information. |
These features, among others, enable you to gain a holistic view of your IT infrastructure and take informed decisions to optimize its performance.
Setting Up Azure OMS Workspace

Setting up the Azure OMS Workspace is a straightforward process. Here’s a step-by-step guide to help you get started:
- Log in to the Azure portal and navigate to the “Create a resource” section.
- Select “Operations Management Suite” from the list of resources.
- Fill in the required details, such as the workspace name, subscription, resource group, and region.
- Configure the log analytics workspace, which will be used to store and analyze your data.
- Set up the necessary permissions and configurations for your users and applications.
- Once the setup is complete, you can start using the Azure OMS Workspace to monitor and manage your IT environment.
Using Azure OMS Workspace for Log Analytics
One of the most powerful features of the Azure OMS Workspace is Log Analytics. It allows you to collect, analyze, and visualize log data from various sources, providing valuable insights into the performance and health of your systems.
Here’s how you can leverage Log Analytics in the Azure OMS Workspace:
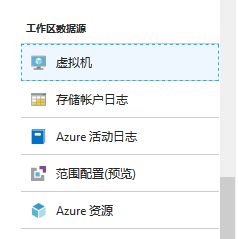
- Connect to your data sources, such as Windows and Linux servers, virtual machines, and cloud services.
- Define the data collection rules to capture relevant log data.
- Use Kusto Query Language (KQL) to analyze and visualize the data.
- Create dashboards and reports to gain a comprehensive view of your IT environment.
Integrating Azure OMS Workspace with Other Azure Services
The Azure OMS Workspace can be integrated with various Azure services to enhance your monitoring and management capabilities. Some of the key integrations include:
- Azure Automation: Automate routine IT tasks and workflows using PowerShell scripts.
- Azure Backup: Protect your data by backing up critical systems and applications to Azure Blob Storage.
- Azure Security Center: Enhance the security of your environment with advanced threat protection and security information.
These integrations allow you to create a cohesive and efficient IT environment, ensuring that your systems are always up and running.
Conclusion
The

